
Home | Mailing List | Specifications | Care and Feeding | Modifications | Vendors | Literature
5/22/2010
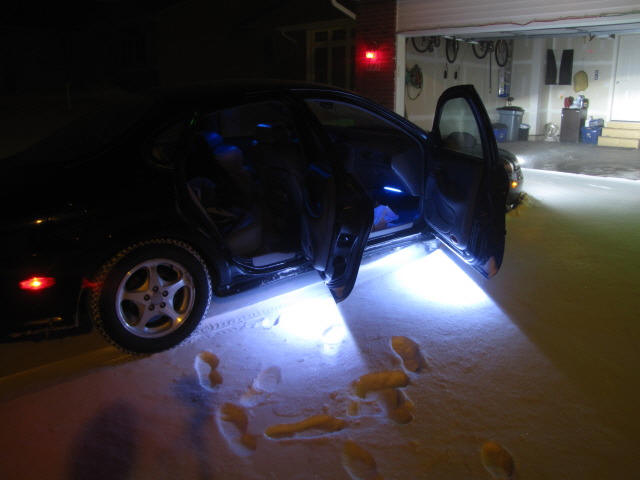
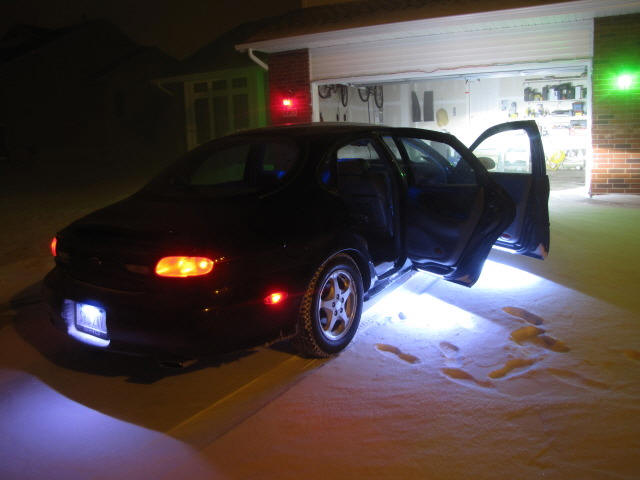
LED puddle lights
Gen 3 SHO
Parts required:
2x 2ft LED strips, any color, Oznium.com
2x 1ft LED strips, any color, Oznium.com
4x ½” rubber grommets
wire, I suggest 22awg stranded speaker wire
wiring connectors
tools needed:
right angle drill (possible to do without)
basic wiring tools
soldering tools
screw drivers
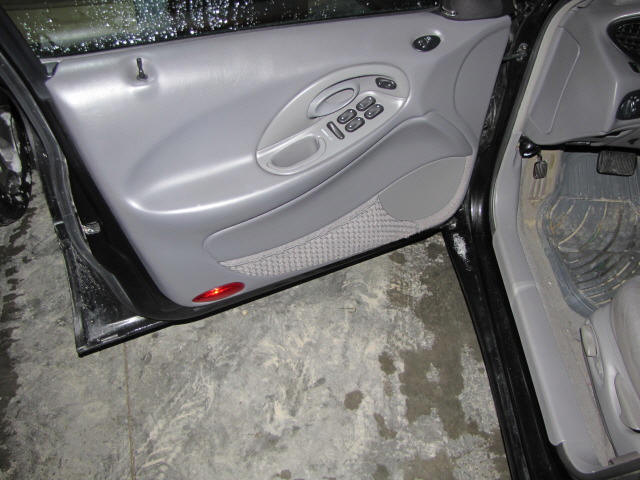
Remove all 4 interior door trim panels
remove the woofers (speaker) from the front doors
peel back some of the plastic water shield from the rear doors for access to the
stock wiring
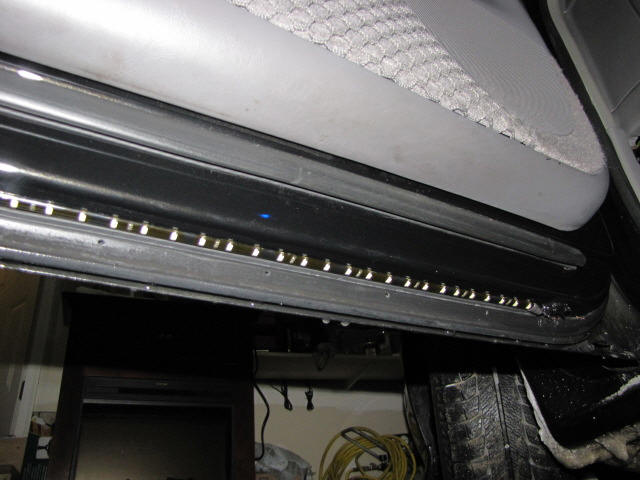
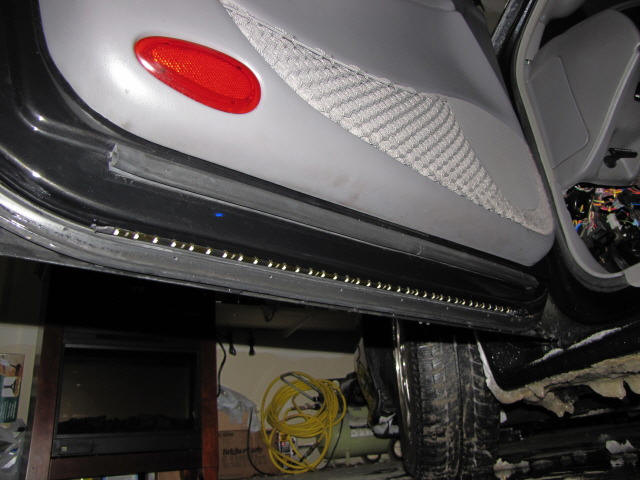
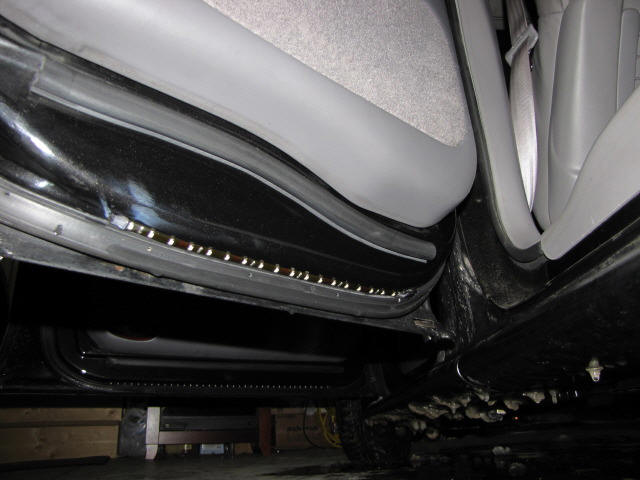
Mount the LED strips
The 2 ft strips go on the front doors, the 1ft strips on the rear doors.
Clean the bottom of the door with alcohol. The LED strips have attached adhesive
strips which hold very well even through water, but the surface must be clean.
Mount the strips on the inside of the weather stripping on the bottom of the
door. Center it on the horizontal section of the door.
There are three obvious ways to get the wires to the inside of the door.
route the wire up along the inside of the door and under the interior door
panel. The wires will reach and they will be fairly subtle, but they will be
visible and it will not look professional.
Cut the connector off of the LED strips and route the wires through the
rectangular water drain at the lower inner corner of the door. The wire will
still be visible, and the connector would have to be reinstalled or left out.
Drill a hole in the bottom of the door to get the wires in.
I went for option 3 because it was the cleanest. If so drill a 1/2” hole in the
bottom of the door at the end of the strip where the wires are. There isn't
anything on the inside of the door but verify this before drilling! Take a 1/2”
rubber grommet, coat the outer edge of it with silicone and insert it into the
hole. The silicone will seal the bare metal to prevent it from rusting, the
grommet itself will prevent the wires from being damaged by the sharp edges. The
1/2” size allows the supplied connector to fit. If you remove the connector the
hole could be smaller, but I left it in just in case I ever have to remove the
doors or disconnect one strip for any reason. Once the wires were through I
filled the remainder of the hole with silicone. I'll leave the water drains to
the stock location.
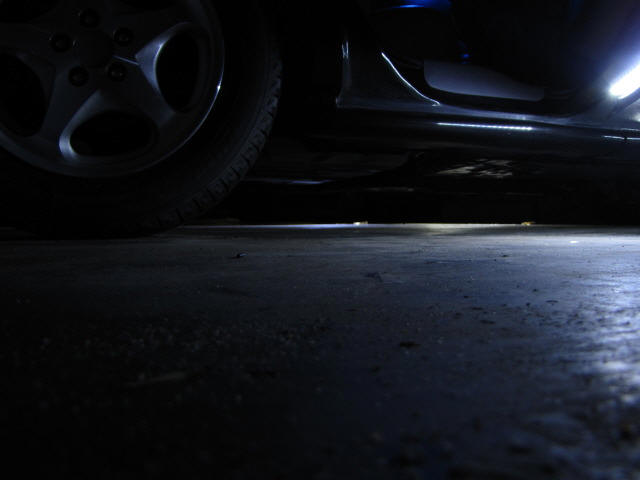
the strips are completely hidden by the doors. they can't be seen unless you are looking from below the door.
Route the wires into each door through the stock wire passageway. It is
possible to use a single conductor wire and get ground from inside the door, but
I figured it would be just as easy to do with a 2 conductor wire, and easier to
troubleshoot later if anything goes wrong.
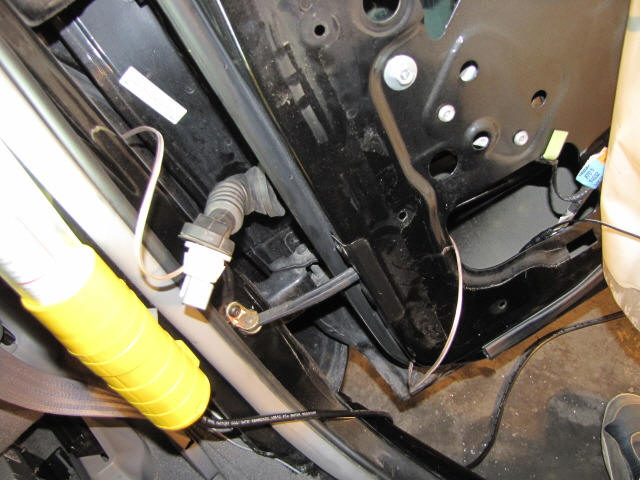
Driver's front door
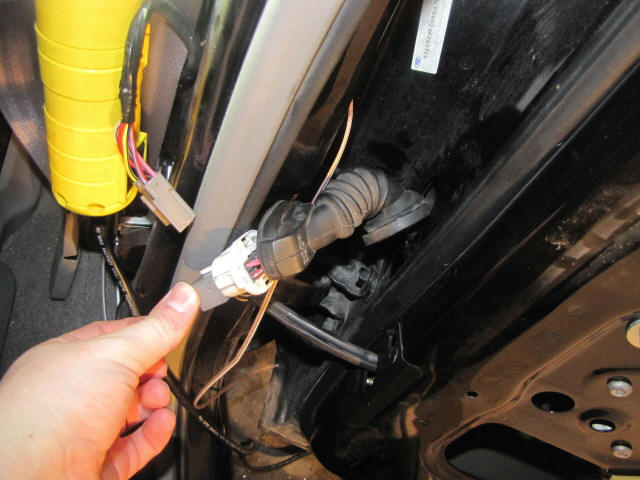
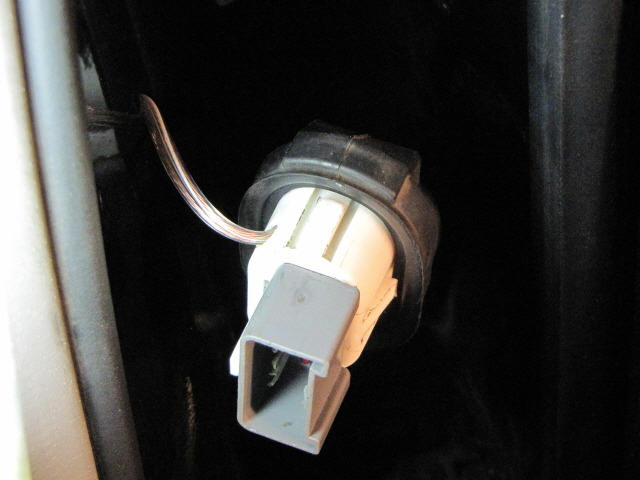
this one is the trickiest. Remove the plastic cap from the top of the connector
block in the door jamb area. Using a 10mm socket unscrew the connector and
disconnect. Cut the plastic tie that holds the rubber wire duct onto the lower
part of the connector and pull the rubber part off the connector. In the door
jamp locate to copper colored hex head screws, one just above and one just below
the plastic connector block. Loosen them so the block can be moved slightly.
Fish the wire from the inside of the car through the rubbere duct. The wire must
bypass the stock connector, but pull the rubber duct up around the connector as
it was but with the wire sticking out. Looking carefully under the plastic
connector block you will see some passageways below it that the wire will fit
through, fish the wire through one of those holes and pull it out through the
speaker opening. Make adjustments to get rid everything the correct length then
replace the plastic tie with a wire tie (preferably a black one. It will have to
be a long tie to fit around) this will hold the rubber duct in place. Tighten up
the plastic connector block screws to secure it back in place and reinstall the
connector. Carefully pull the slack out of the new wire from inside the door so
it fits perfectly. Once this is done the new wire will be invisible. Replace the
cap on top of the connector block. Seeing pictures should make this more clear.
There are details about this method of getting wires into the driver's door on
my writeup about my audio system install.
I will have to see if I can find them
Passenger's front door
This is the easiest. There isn't anything in the way of the rubber duct for the
stock wires, just fish the new wires through and attach to the LED strip wires
by solder or butt splices. Be sure to tie the wire away from all moving parts
inside the door!
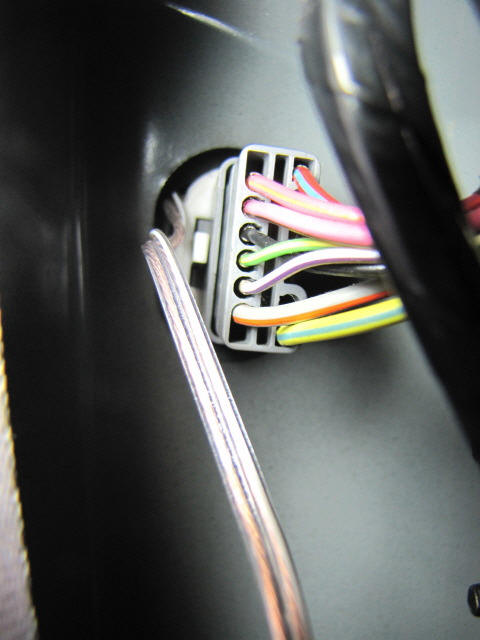
Rear doors
These were more difficult than I had thought. But both can be done the same way.
You must remove the B-Pillar interior trim panel. This is a pain. The seatbelt
runs through it but fortunately its not nessesary to remove it completely, just
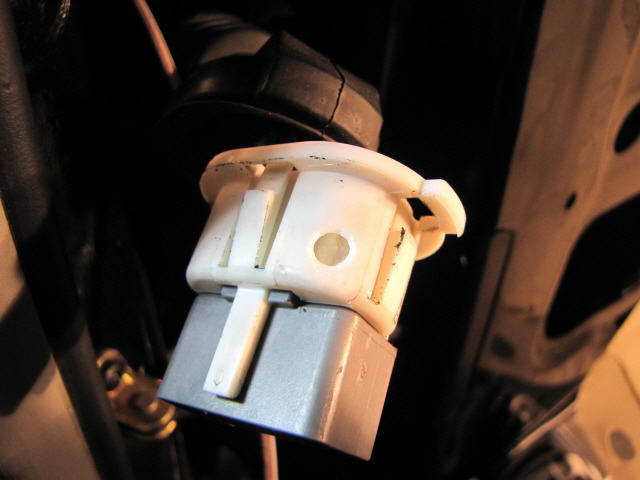
get it out of the way so you can get to the wiring. Remove the rubber duct from
the door side and the car side. On the car side you will find that there is a
connector for the factory wires which clips into place. Press on the tabs to
release it. Remove the rubber duct from the connector. Fish the wire through the
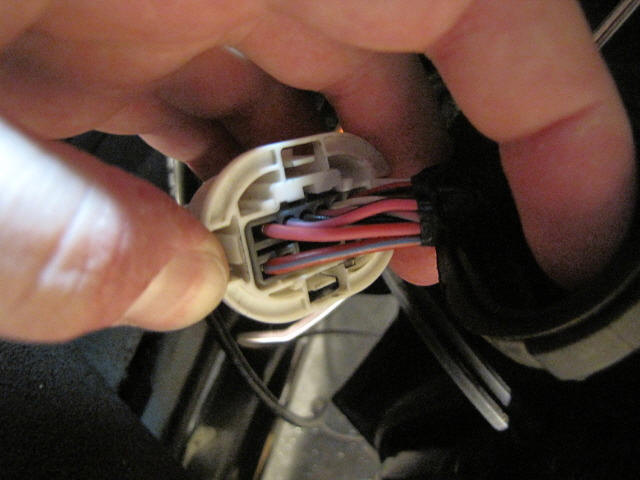
rubber duct. Now the wire must be passed through the connector. If you look at
the end of the connector you will see two channels. They do not go through
because they are blocked at the far end. These channels are large enough to fit
a 2 conductor 22awg wire. Drill a hole large enough for the wires to pass and
fish the wire through the channel in the connector and through the hole.
Reinstall the rubber grommet on each side and carefully route the wire through
the stock hole and clip the factory connector back in place. Don't forget to
reconnect the factory harness! Route the wire forward under the trim panel and
up to the floor light area on the side of the door
Connect the wiring
splice the wiring into the floor light wiring. Be careful of polarity. Nothing
will happen if they are hooked up wrong, but the LED strips won't work. Test
them to make sure they work before putting everything back together! If they
don't, locate the loose connection and fix it.
Mike
97 ES
10 TBM
©Copyright 2000 - 2009; all rights reserved by V8SHO