
Thanks to: Ron Porter
First, jack up the car, remove the LF tire and the inner fender liner. The sax can come out as one entire piece, but I did it as two, with the long piece from the
air box to below the "fat part" as one, then the power horn as the second. There are three molded-in snap bumps in the
air box piece, so you compress the snorkel from inside the air box and snap it out. One of the three bolts is right where the sax goes through the
fender well. The second goes up near the battery. If I recall, it's the same size metric as a std socket (like 13mm - 1/2"), so I used a universal and a long extension to loosen it from the top. At this point, I separated the lower "horn" part of the sax from the main body. It just snaps in below the fat part of the sax, so I just started it with a screwdriver, and pulled it apart.
The third is a bit of a pain. It's an 8mm bolt down near the horn end in the fender, and the head faces toward the front of the car. It took box wrench, and you can't get much of a turn on it, so it takes awhile before it's loose enough to back out by hand.
Really, it's very easy once you do the rotation of the air box about 1.5" clockwise, pivoting around the (loosely screwed in) rear
air box bolt, and leaving the pin and fender well bolt unattached.
For more instructions with pictorials for removing the Sax (air horn) click
here
| The parts needed are: | |
| 45-degree street elbow, 3" ID, from Ace hardware (about $3), | 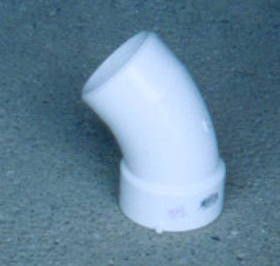 |
| 3" rubber coupling with two SS hose clamps (about $4) from Ace. | 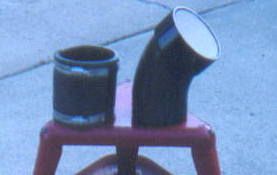 |
| Black paint (I had it laying around the garage), |
After removing the Saxocone (click here), the only "trick" is to rotate the air box slightly to get the opening to line up with the rubber coupling. Pull the post on the air box out of the battery case, do not use the bolt into the fender well (I covered the hole with the K&N decal), and loosely put in the bolt at the rear of the air box. The air box will be held in place with the rear bolt and the rubber coupling clamped on to it. Insert the PVC into the fender well per the 3rd picture, insert the rubber coupling over the end of the PVC, then slightly rotate the air box toward the battery so the rubber coupling fits over the opening. Cinch up the worm clamps and you're done (except for putting the fender well liner and tire back on).
| And the results | |
| Street elbow poking through the fender (You are looking from inside the fender well) | 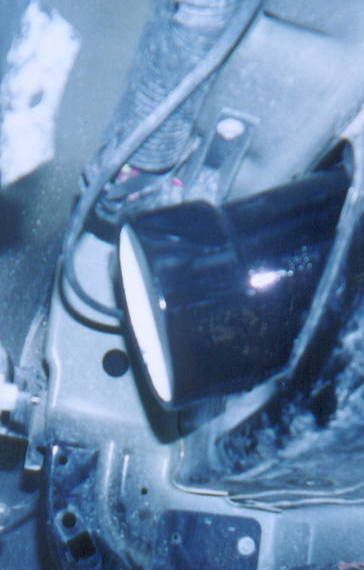 |
| The stock setup minus the Saxocone |  |
| The Porterized setup (Notice how the air box is moved closer to the battery.) | 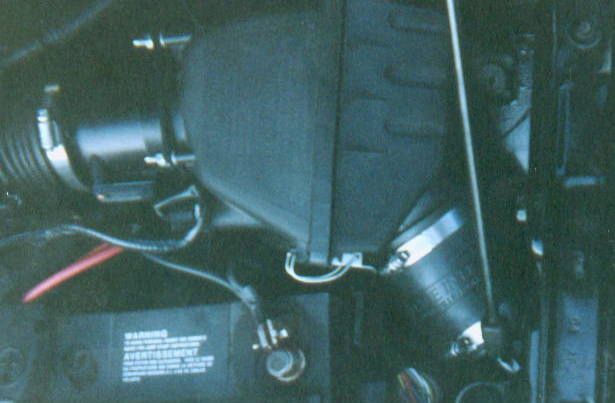 |
I was able to wiggle the little black box back into it's holder next to the battery. The front
air box clamp has to be put on with pliers, as the air box is now closer to the battery.