
New04/17/06, updated 04/18/2006
This is a fairly easy mod to do. It just seems all the info was not in one place.
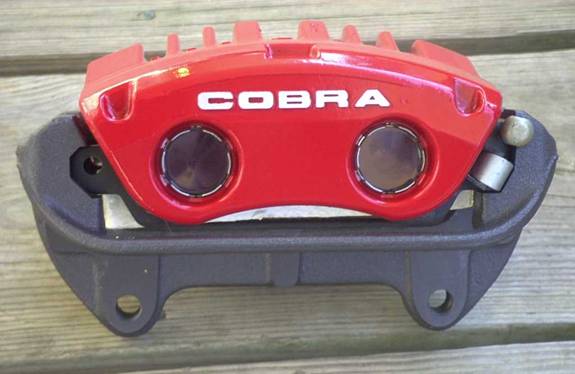
The parts needed are the ’94-’04 Cobra loaded calipers with the bracket. Others may be substituted but because I have no direct information I will only refer to the ‘94-‘04 Mustang 2003 Cobra Front Brake Calipers M-2320-AF. These are dual piston, aluminum calipers made by PBR. At 4 lbs each they are half the weight of the OEM front calipers. This mod can be done with the original rotor and wheels as well as 13” rotors which are more effective. You will also need some custom brake lines. Though again some have modified the OEM lines to work. I have no direct knowledge of this.
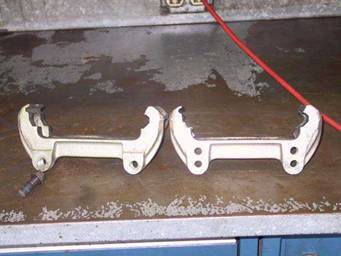
The Cobra caliper bracket needs to be modified. A new hole needs to be drilled and tapped .700” inward and are 12 mm x 1.75 thread. Use a 27/64” bit to drill the hole. You can also see the original boss that needs to be milled flat. Be sure to file the entire face flat so no casting roughness interferes with the centering of the rotor. You will also need to take a bit off of the lobe under the original holes so they do not touch the knuckle and interfere with the fit. I ground mine off almost all the way to the original hole.
Here is a picture of what needs to be done, original on the left, modified on the right.
And a picture of the calipers I got from Parts@BlueOvalIndustries.com
through an eBay auction for $200 +S&H.
The brake hoses I got from Doug at FPS http://fordspecialists.com
.
.
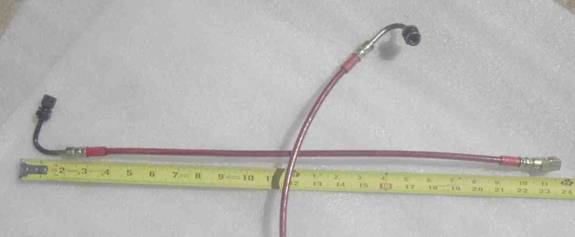
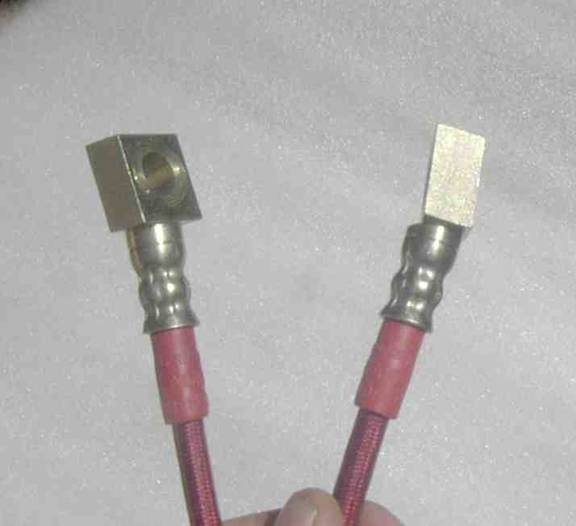
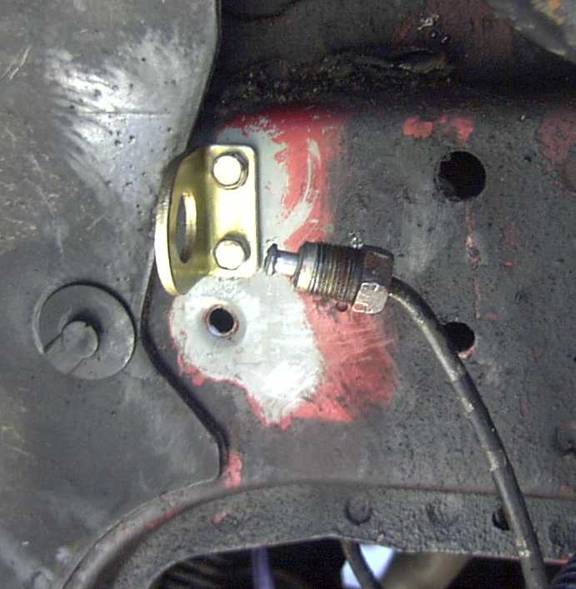
To secure the hoses you need to mount a new bracket where the hose attaches to the steel hard line. Note the passenger and drivers side fittings are two different sizes. Use some heat on the brass block before trying to loosen the fittings when disassembling the rubber OEM lines. It doesn’t take much and the fittings will come apart easily. Mine took a 13 mm wrench.
*insert pix*
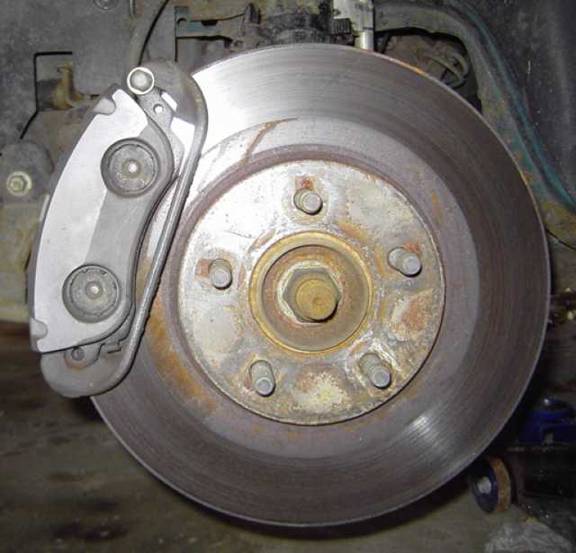
I used 2- #10 x 24 hex head SS bolts. The top hole goes through two layers of steel. If I were to do it again I would move the brackets about an inch or so towards the front to give a big more slack in the hose. I have no SARC sensors which is where the OEM lines attach so a tie wrap is used. Please excuse the rusty rotors. I can assure you they are no longer like this.

The calipers must be mounted with the bleeder screw up which puts them on the opposite side that they are mounted on for the Mustangs. So pay no heed to the L and R that is on the calipers. Also the pad retaining pin goes up.
I believe this is a Mach 1 caliper, same thing but not as pretty.
Here are a couple of threads from SHOforum dealing with this, mainly on the Gen 1-2, but still a lot of good info.
http://www.shoforum.com/showthread.php?t=59280
http://www.shoforum.com/showthread.php?t=56971
So basically get the loaded calipers, get some custom brake hoses, get the new holes drilled in the brackets and the surface of the bracket milled flat and then mount the new hose bracket. The banjo bolts are the same as OEM as are the bracket mounting bolts.
Paul Nimz
________________________________________________________________________
04/18/2006
I think it should be noted in the instructions that the mounting holes relocation is only if the calipers are to be used with the stock diameter rotors. The 13” rotors will not require the holes to relocated since that is what they are made for. The 13 rotors on the other hand do require being over-drilled to fit the bolt pattern of the SHO. All other mods he has listed are applicable, though I didn’t go with different brake lines, I probably should have but the stock ones did fit albeit a bit on the tight side when the front of the tire is at the full inside lock position.
Carter Fujibayashi
________________________________________________________________________
04/19/2006
Thank you. Just made me feel better to prevent somebody going through all that and then discover that they didn’t have to do the work for the hole relocation. The only real confusing thing I found was that the calipers are marked “left” and “right” however they as Paul noted have to go on the opposite sides since the bleeders would be pointed down which makes bleeding them properly impossible but the confusing part was the brackets MUST stay on the ORIGINAL marked side otherwise the locking pin becomes the “pressure” side carrying the entire load when the brakes are applied. This makes for very noisy stops with lots of unnerving clicking and clacking sounds as the caliper shifts around inside the bracket on the locking pin. I really was wondering how long that pin would last until it was worn down enough to allow the calipers to just “roll” out of the bracket but decided against doing the trial.
Carter Fujibayashi