
new 3/12/03
Here is the instructions for the removal of the tensioner that I promised the list. Sorry for the delay! AS many of you know, Kirk welded my cams for me and also installed new belts as a favor. After changing the belt, the tensioner was froze and therefore the belt squealed like crazy. After the journey home, I removed the tensioner and got it working again. Then a new problem arose...There was a high pitch whining noise, almost like a bearing going out. I don't drive the car in the winter and I had some time last night to go out and diagnosis this new noise. This noise wasn't there before installing the new belt and after trying to diagnose a bad bearing which I could not find, I came to the conclusion last night that maybe it was the new Goodyear Gatorback Belt that Kirk installed for me. Sure enough, after re-installing the old OEM Ford belt, the noise stopped and it is quiet! Moral of the story, it seems that while these new Goodyear gatorback belts may provide extra grip, they do so at the cost of emitting an awful whining noise!
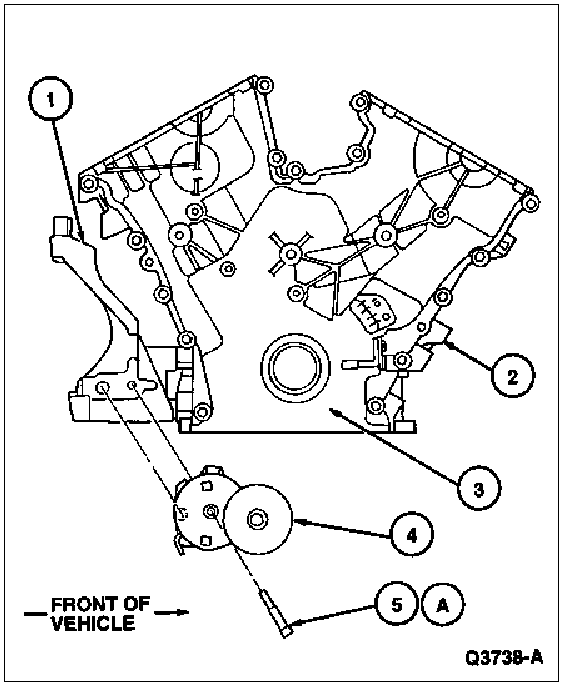
3.4L SHO Engine
Removal and Installation
1. Remove serpentine drive belt as described. Using a 3/8 inch ratchet on the lifting lug, rotate drive belt tensioner counterclockwise (upward) and engage spring keeper. Remove drive belt from drive belt tensioner.
2. Remove drive belt tensioner retaining bolt and drive belt tensioner from alternator bracket (10A313) .
3. To install, reverse Removal procedure. Tighten drive belt tensioner retaining bolt to 52-78 N-m (39-57 lb-ft).
As the saying goes, it's always easier said than done.
1.) Jack the car up and remove the front passenger side wheel.
2.) Remove plastic retaining plugs from the bottom of the plastic fender lining and pull back to allow some more room to work near the tensioner and belt.
3.) Remove the belt off the tensioner pulley by rotating the tensioner counter clockwise with the 3/8" ratchet.
4.) The next part in removing the tensioner from the alternator bracket is tricky. You will need at least a 12" extension to get sufficient room to turn a socket. And leave it to ford, its an allen key that is needed to remove the bolt. The size appears to be a 6mm hex. I say appears because the salt up here in the northeast corroded the hole immensely! I ended up hammering the allen key into place to make sure it wouldn't strip. BE VERY CAREFUL not to strip it! This bolt in theory shouldn't be too tough to remove, however from the salt in the north east, I had to use a breaker bar. After one loud pop, I didn't know if it stripped or if it came free. Thankfully, it broke loose and I soon was able to pull the tensioner out.
5.) With the tensioner free from the car, I doused it with oil. Then, With another person helping, have that person use a screw driver to hold the tensioner while you use the 3/8 socket and move it through its entire range. After the oil had been worked through, the tensioner was free and it did not stick and stay in one position as it had before.
6.) Re-install tensioner back into the block and tighten down. The manual says 39-57 ft/lbs of torque but I found that to be a lot...especially with this motor being aluminum and such. I probably used about 25-30ft/lbs.
Gregory Brown
97 TR SHO